One of the most stunning and beautiful types of tortoise is the Geochelone carbonaria (Red-Footed Tortoise). It is common across Southern Central America and South America, and as a result of its vast distribution, there are several local variants. These vary in terms of coloration and possible size. Their popularity as pets has grown significantly, and many owners are considering breeding red-foot tortoises. Here are some fundamental aspects concerning Red Footed Tortoise breeding that you’ll find interesting and beneficial if you are one of them.
Breeding Size and Age:
They typically start breeding when they become 6 to 8 inches (20-23 cm) long, which is around 7 to 8 years old, however, at that size, the clutches are less than those that fully-adult red foot tortoises would produce.
Breeding Season:
Females first began nesting on an approximately 30 days cycle, starting in late July and continuing as late as mid-March. Several of them – particularly the Brazilians – don’t begin until November. Eggs laid by red-footed tortoises are snow-white when they’re first laid.
Breeding Diet:
Aside from size or maturity, the most crucial factor of successful red-foot tortoise breeding is providing your pet with varied, healthy food. When given a wide variety of fruits, vegetables, and leafy vegetables, red-foot tortoise owners report having the largest clutches and highest hatch rates.
Red-foot tortoises that aren’t being bred must only be fed animal protein every other week. Chopped boiled eggs, boiled chicken, snails, worms, slugs, grubs, shrimp, or even salmon or tuna that has been canned in water are all examples of foods that contain animal-based protein. Small clutches, incompletely developed embryos, hatchlings, and infertile eggs that do not survive regardless of getting good care are all consequences of poor nutrition.
Don’t give kale or spinach. When it comes to greens, variety isn’t always essential, so anything that is in season or on sale is OK. Red foot tortoises, unlike other tortoises, can eat fruits regularly. Offer seasonal fruits and vegetables like strawberries, pineapple, black plums, and peaches but avoid bananas and tomatoes, which can cause diarrhea.
Breeding Groups:
Red-foot tortoises can reproduce as a single pair, however breeding groups considerably increase the possibility of success. It is recommended to keep at least two red-foot males so they can compete with one another, as this is believed to aid in successful breeding.
Red-foot Tortoise Gender Distinctions:
Needless to say, you must ensure that you have at least one female and one male.
In Males: The vent (cloaca) extends from the rear of the shell and has a concave plastron.
In Females: The vent (cloaca) is located inside the shell’s edge and has a flat plastron and a rather stubby tail.
Red-Footed Tortoise Breeding:
The steps of red-footed tortoise breeding are explained below:
Step I: Pre-Breeding Behaviors:
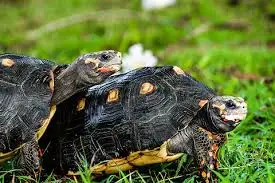
Male red-footed tortoises move their heads in particular ways during the mating ritual. He starts by standing next to another tortoise and making a series of rapid sideways head movements before returning it to the middle (head-wagging). The female second tortoise won’t move her head in response if it’s a male. Before mating, the male will move around and sniff at her tail to confirm what he already suspects.
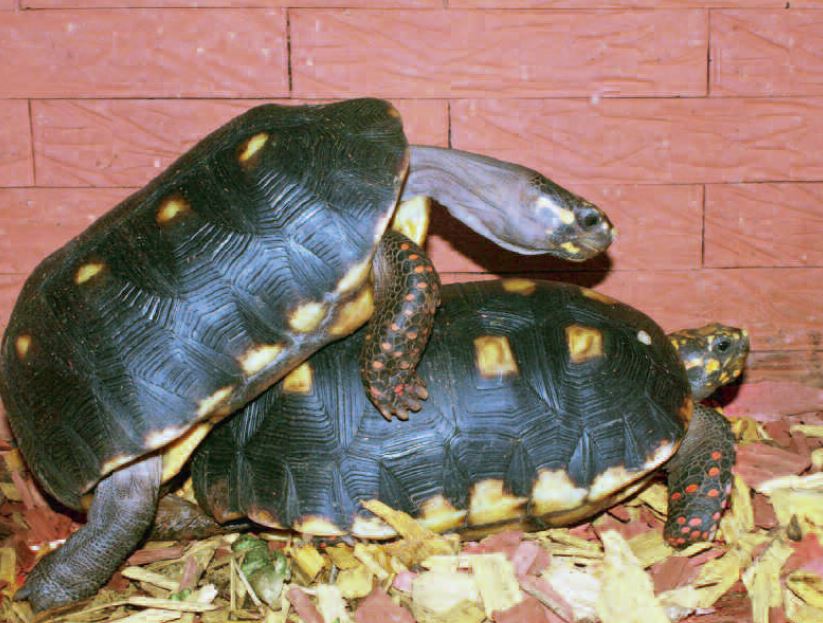
Step II: Breeding:
When the female is prepared to mate, she lifts her hind legs, which is a need for successful copulation, and the male mounts. Males frequently follow females until they can position them properly for mating. The male’s shell can fit snugly over the top of the female’s shell because the bottom of its shell is concave. Male red-foots make an odd noise during mating. It makes a loud clucking noise that is nearly chicken-like. Male yellow feet vocalize as well, however, it is a much mellower variation of the red foots’ cluck.

The female will leave, feed, or search for a spot to rest if she is not interested. There isn’t any of the ramming and biting that happens, for instance, in European tortoises. Even fully adult Red-Footed Tortoise males are completely calm and peaceful among themselves.
Step III: Pre-Nesting Behaviors:
A gravid female will start to exhibit a highly distinctive activity called “nest searching” or just “pacing” six weeks or above after breeding. This might continue for a week or even many days. However, some female pacers only do so for a single day.
This is when the female would drink more than normal yet pay little attention to her food. Most noticeable, however, will be her pacing back and forth against a fence or other obstruction and a generally restless attitude. She could begin to dig a nest in the middle of the day, and she might succeed on her first try. But rather frequently, a female will leave that nest hole and go to rest for the night (particularly a younger female).
But the next day, she would continue her pacing and nest-searching behaviors. Most keepers take it in after watching this display a few times. While they occasionally start digging their nests in the middle of the morning, most of the keepers watch for the female to start digging in the late afternoon and then observe her until she is completed. She will ultimately drop her eggs and spend a significant amount of time hiding the nest location and the eggs. She then walks out in the dark and sleeps far into the following day, and occasionally even the day after.
Step IV: Nesting:
The nest-digging process starts when the female tortoise is prepared to lay her eggs. Nests are excavated preferably next to a wall or other protective barrier. To wet the ground when the nest is being excavated, the tortoise excretes a liquid. The depth of the nest is reached by the hind feet. Before laying her eggs, a female may frequently dig up to three “false” or unused nests.
It often took two hours or more to complete a nest digging, and it was often done late in the day. Red-footed tortoises excavate large nesting holes. They set up a foothold on either side and would put one foot on it while using the other foot to scoop up the soil. They will then swap feet and scoop with the other one.
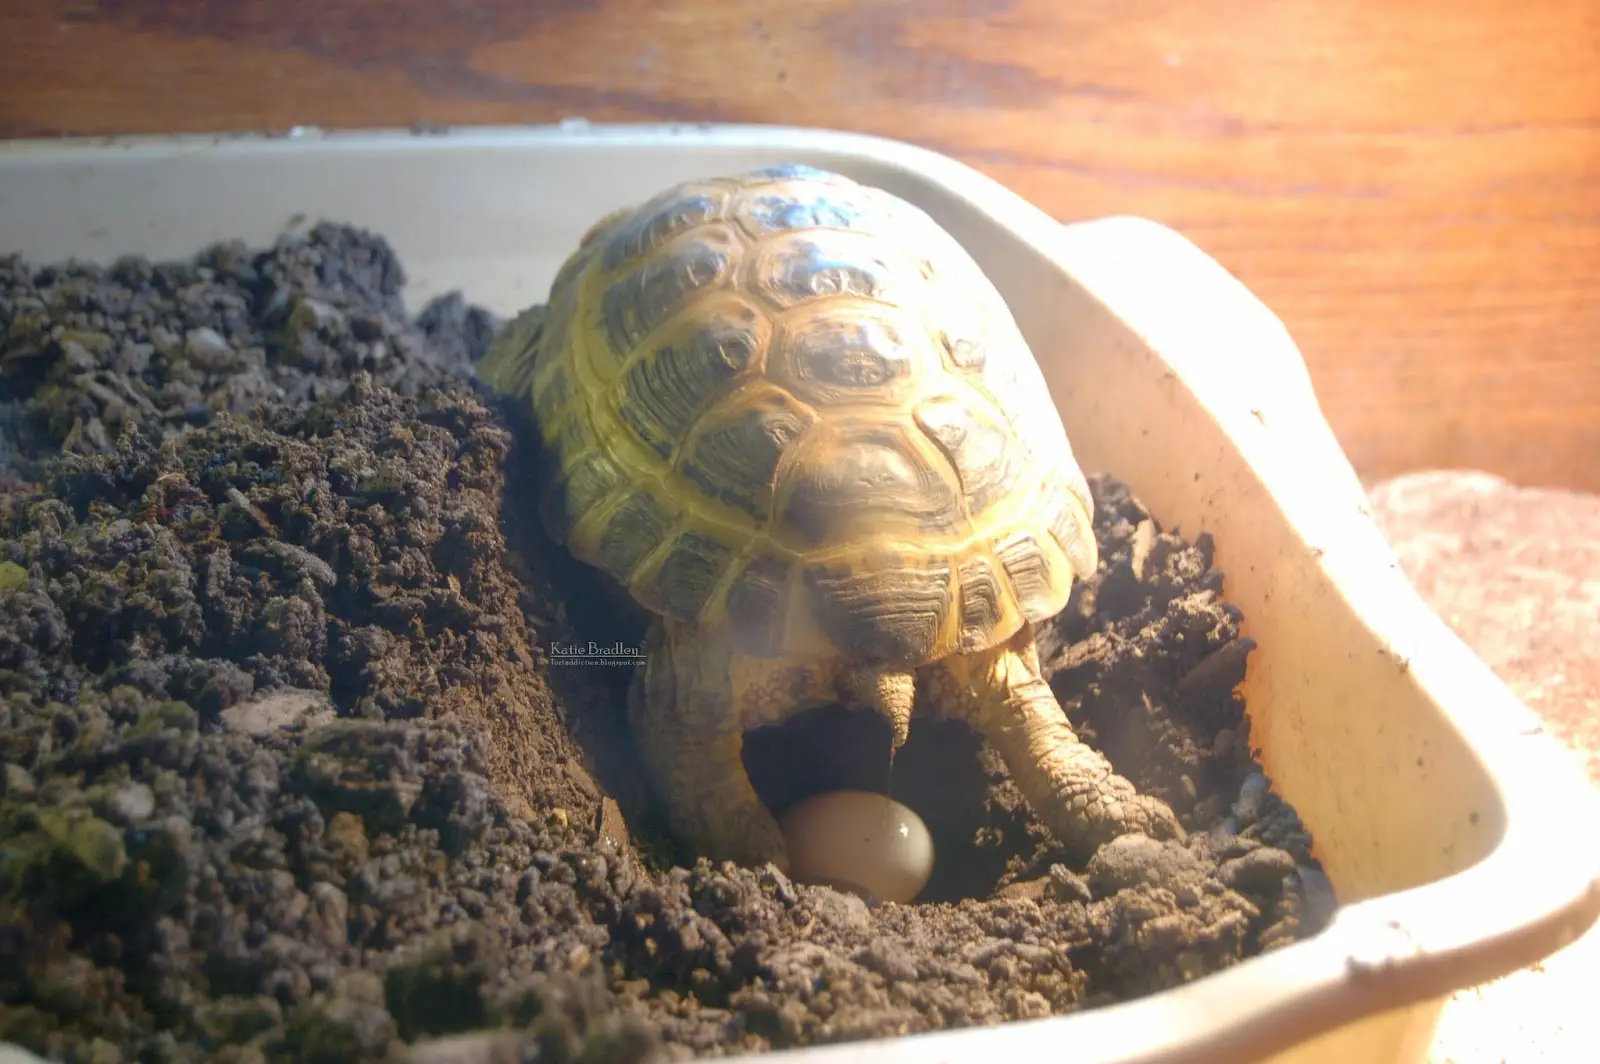
Step V: Egg Laying:
Once laying begins, extra liquid is excreted. The golf ball-sized, round/oval eggs might then be laid singly or in pairs, rapidly or over several minutes. Typically, the female digs an egg-laying hole that is just 5 to 15 cm deep. Clutch sizes range from 3 to 10 eggs but often include 5 to 6 eggs. Larger and older females typically lay larger eggs and clutches. The female covers the nest with soil using her hind legs once she has finished laying. The process of excavating the nest, laying the eggs, and covering it might take up to three to four hours. The female stays in what may be called a trancelike condition for the duration of the entire egg-laying phase. Before and after egg-laying, the female drinks greedily.
Step VI: Egg Incubation:
Once the female has laid her eggs, cautiously dig them up. Get yourself an incubator before starting breeding. Fill the incubator half with moist vermiculite and partially bury the eggs inside little plastic food containers. Set the incubator’s temperature range of 84° F and 88° F.
You will get male hatchlings at 84° F, female hatchlings at 88° F and a mix of both at 86° F. Set it between 85° F and 86° F, and don’t bother about the gender. The incubator’s humidity level should be maintained at a constant 70% to 90%. (mist the vermiculite as and when necessary to maintain this humidity level).
Step VII: Egg Development:
Although many breeders claim that “chalking” indicates that the eggs are good, sometimes even poor eggs will chalk after a few weeks. The eggs eventually change from appearing translucent pink when they are first placed to looking solid and clean white. After a few weeks, you may candle the eggs to check for veins. Hold a little penlight up to the eggs without taking them out of the incubator if you want to know if they’re fertile. Typically, the egg’s interior is reddish-pink with some veins visible. However, when the egg develops and grows, you won’t see any changes.
Although when the egg gets older and chalks up, you won’t be able to see inside it without flashing a very bright light on it. Remember, do not mess with them because you’re not assisting in the egg’s hatching by doing this. An egg that’s about to hatch will seem very white and clean. The inner membrane of the egg sometimes appears as a clear, small spot inside the egg that is shrinking away from the eggshell. If you shine a light on the egg, it will seem to be a clear “bubble,” at which point you should heavily mist the egg with water.
Step VIII: Hatching:
When an egg hatches, the neonate may poke its nose out for a day or two before doing much else. They often make an opening on one side of the egg before pulling their nose back into the egg. The newborn will turn within the egg many more times during the following day or two, poking holes in the shell and splitting the egg in half along the midline. Shell fragments may stick on the hatchlings’ carapace after hatching, but they will ultimately come off. When a newborn is working on the opposite side of the egg with its egg teeth, you will frequently see its bottom poking out of one side of the egg. AT THIS POINT, DON’T REMOVE THE HATCHLING.
While they can seem a little confused when they initially come out of the shell, the carapace will straighten within the first several days. Don’t mess with the new hatchling only if it is bothering another egg nearby. The hatchling should be misted with dechlorinated water at this time to prevent it from becoming very dry, which can happen in the artificial environment of an egg incubator.

Image credit @ All Turtles
The newborn will start to move about within the incubator after a few days, but it will still have a very large yolk sac. Take it out and put it somewhere warm and humid so that it may finish absorbing the yolk sac. They will start picking at food even before that, and you must be cautious not to make them eat the incubation medium. Neonatal tortoises appear to find the white-colored Perilite very attractive for some reason, and I have observed them sitting within their eggs and lowering their heads to consume it while they still have a significant amount of yolk sac left. These hatchlings often make their first droppings in the form of little white piles. However, it never appears to hurt them.
Embryos range in size from 1 to 1-1/2 inches. Unlike yellow-footed tortoises, they don’t have any tooth-like projections on the edges of their carapace. The hatchling will appear to sleep, or “hibernate,” in some sheltered corner for the first week. All the nutrients it needs are contained in a pinkish or yellowish sack attached to the plastron.
Hatchling Care:
Red feet are grown in simple plastic containers with one end lifted slightly so that shallow water can stand on the other side. In addition to providing heating and lighting, their housing must protect them from outside predators. For the first few years of their lifespan, they should only be kept indoors. For newly hatched tortoises, a glass terrarium of about 20 gallons works well, but as they become older, you’ll need to increase.
Almost from First Day, all hatchlings are misted with warm water 2 – 3 times every day and utilize a hand-held plant mister. The hatchlings can hide under long-fibered sphagnum moss that has been pulled apart to get “fluffy” and slightly misted. Humidity levels for hatchlings should be closer to 80% to promote optimal, healthy development.
The eggs’ yolk sac reserves are what the hatchlings eat to stay alive throughout their first week. You may then offer them green leafy veggies after that. As they gain weight, they will eat more and more food. For younger tortoises, split the meal into smaller portions. Before they eat their first bite of strawberry, endive, etc., it may take up to 4 days. Once they understand that eating is beneficial, they don’t quit!
Conclusion:
The Red-Footed Tortoise is not only an excellent pet, but it is also easily breedable. The most important component, and one that is frequently neglected, is the right feeding of the mother tortoise. Redfoot tortoise mating can happen almost any time of the year. However, most breeders say that it often happens between May and August, either during or right after rain. Once the tortoises are the right size and age, you should only begin breeding them. The minimum size that is recommended is between 6 and 8 inches long. With proper conditions and optimal care, you can get successful results in Red Footed Tortoise breeding.
FAQs:
The moist substrate is where female red feet prefer to lay their eggs. They often lay their eggs in the late afternoon. A single female can give birth to two to five clutches annually. Although clutch sizes vary, three to eight eggs are generally considered to be the average.
With this species, incubation can last for periods ranging from 120 to 190 days, with 145 days being the average. It’s possible that the hatchling won’t emerge right away after “pipping” the egg.
Compared to larger, more mature tortoises, baby and juvenile red feet tortoises tend to dry up considerably more quickly. To thoroughly hydrate them, they could also be soaked outside the cage once or twice a week for fifteen to thirty minutes in shallow, warm water. This also aids in keeping the main habitat clean.
Its food should be mostly composed of various vegetables, leafy greens, grasses, and really any type of fruit. Low phosphorus and high calcium content in leafy greens are crucial nutrients for the red-footed tortoise’s well-being.


